
PastaMail – Bulk Email Sender
Documentation
Table of Contents
- Introduction
- Installation
- Configuration
- How to Use
- Features
- Troubleshooting
- FAQ
Introduction
PastaMail is a powerful yet simple bulk email sending tool designed specifically for WordPress users. With just a few clicks, you can send unlimited emails to your audience—fast, efficiently, and without hassle. Packed with automation and real-time reporting, everything you need is in one place. No complicated setup. Just install, create your email content, and send in swarms—just like bees!
Key Benefits
- Unlimited Email Sending: Send as many emails as you need without restrictions
- Real-time Campaign Tracking: Monitor your email campaigns as they run
- SMTP Integration: Built-in SMTP auto configuration
- Attachment Support: Include files with your emails
- Campaign Management: Pause, resume, or cancel campaigns anytime
- Detailed Reports: Download comprehensive reports of sent/failed emails
Installation
Requirements
- WordPress 5.0 or higher
- PHP 7.2 or higher
- MySQL 5.6 or higher
Step-by-Step Installation
- Download the Plugin
- Download the PastaMail plugin ZIP file from the official source.
- Upload to WordPress
- Log in to your WordPress admin dashboard
- Navigate to Plugins → Add New
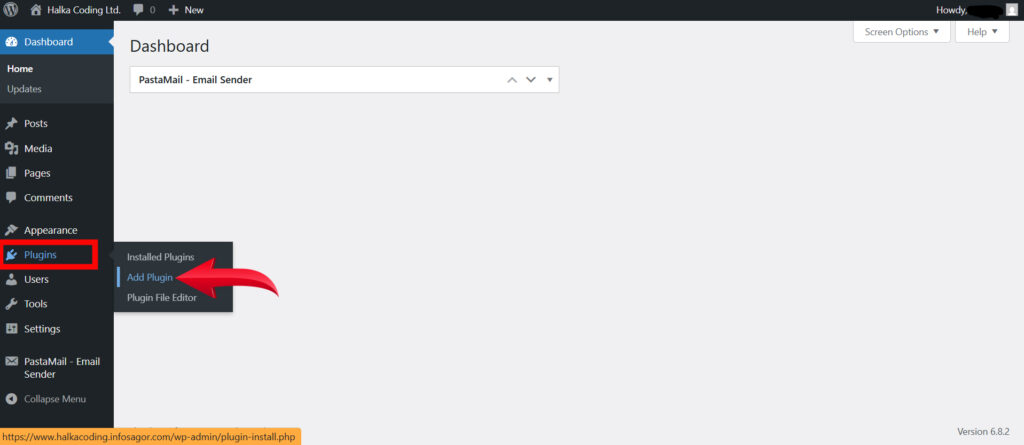
- Click the Upload Plugin button at the top
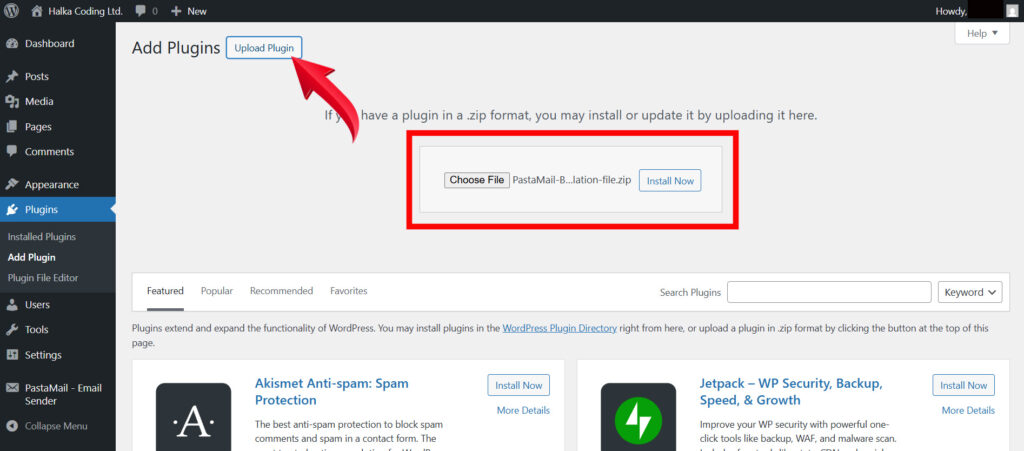
- Choose the downloaded ZIP file and click Install Now
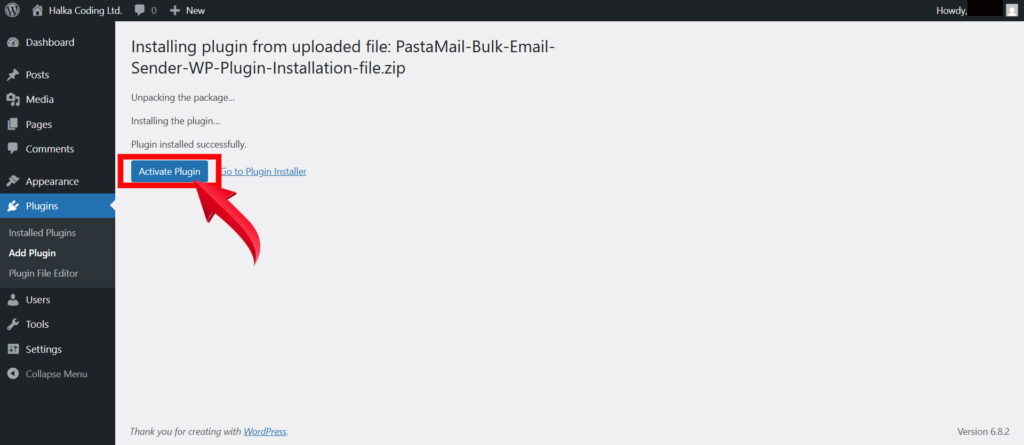
- Activate the Plugin
- After installation, click Activate Plugin
- You’ll see a new menu item in your WordPress admin sidebar: PastaMail – Email Sender
Configuration
SMTP Settings
PastaMail makes it easy to set up:
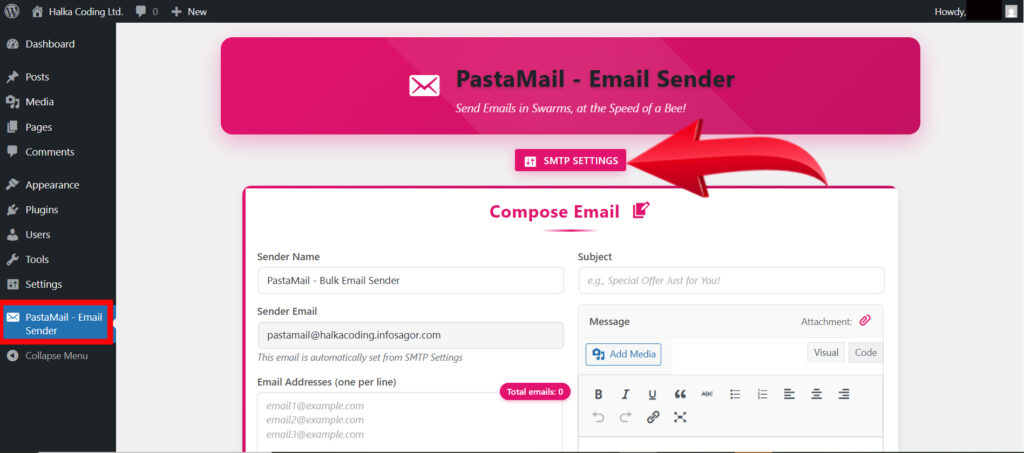
- Go to PastaMail – Email Sender in your WordPress admin
- Click the SMTP Settings button at the top of the page
- SMTP Host: Automatically set based on your domain (e.g., mail.yourdomain.com)
- Security: SSL (Automatically set, SSL Recommended)
- Port: 465 (Automatically set, 465 Standard for SSL)
- Sender Email: Customize the prefix (e.g., info@yourdomain.com)
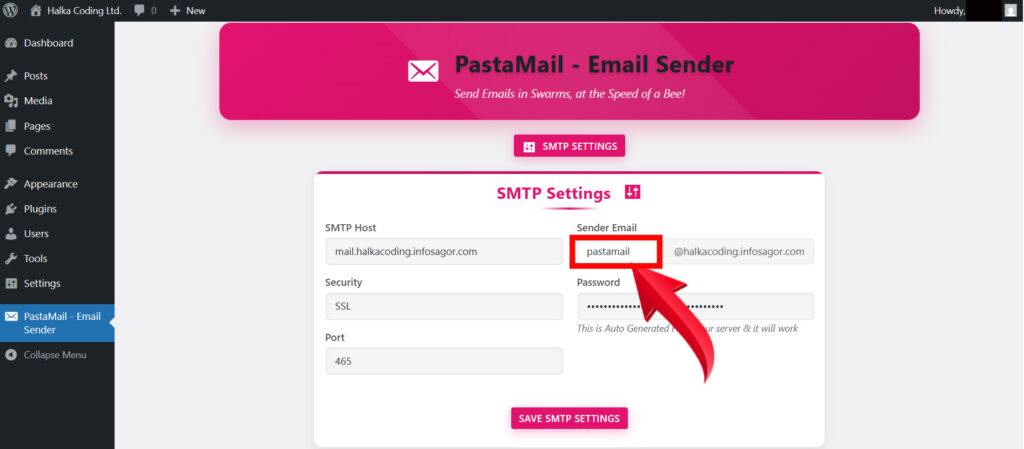
- Password: Auto-generated for your server
- Click Save SMTP Settings to apply your configuration

Done!
How to Use
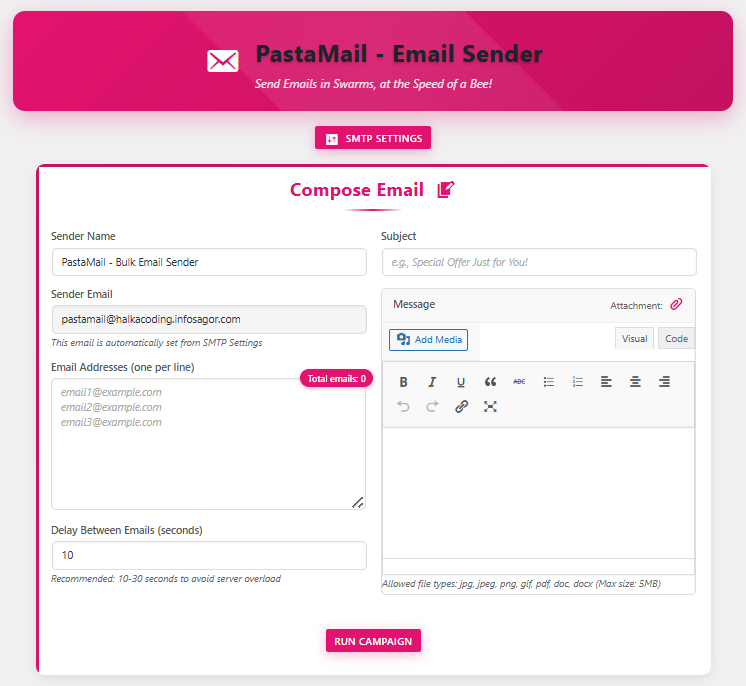
Creating an Email Campaign
- Go to PastaMail – Email Sender in your WordPress admin
- Compose Your Email
- Sender Name: Enter the name that will appear in the “From” field
- Sender Email: Automatically populated from your SMTP settings
- Email Addresses: Add recipient emails (one per line for bulk sending)
- Subject: Enter your email subject line
- Message: Create your email content using the WordPress editor
- Attachment (Optional): Add files up to 5MB
- Delay Between Emails: Set a delay (recommended: 10-30 seconds)
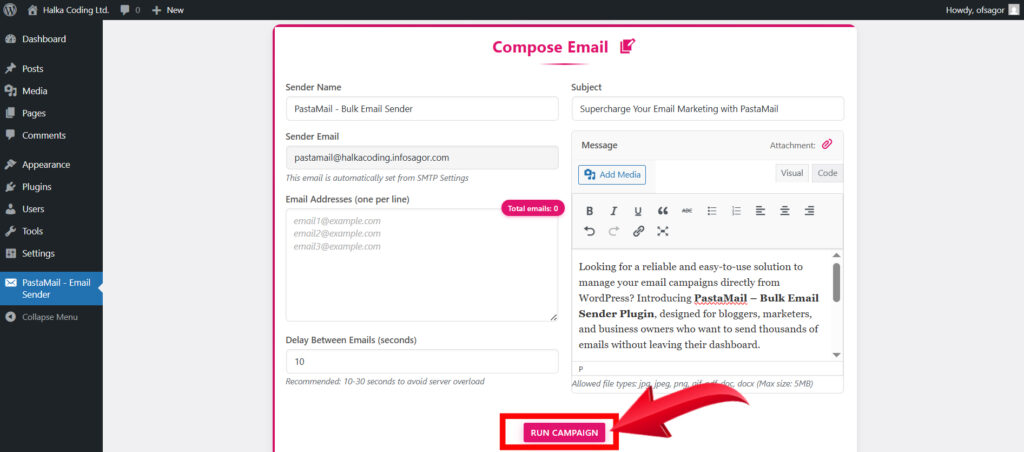
- Click Run Campaign to start sending
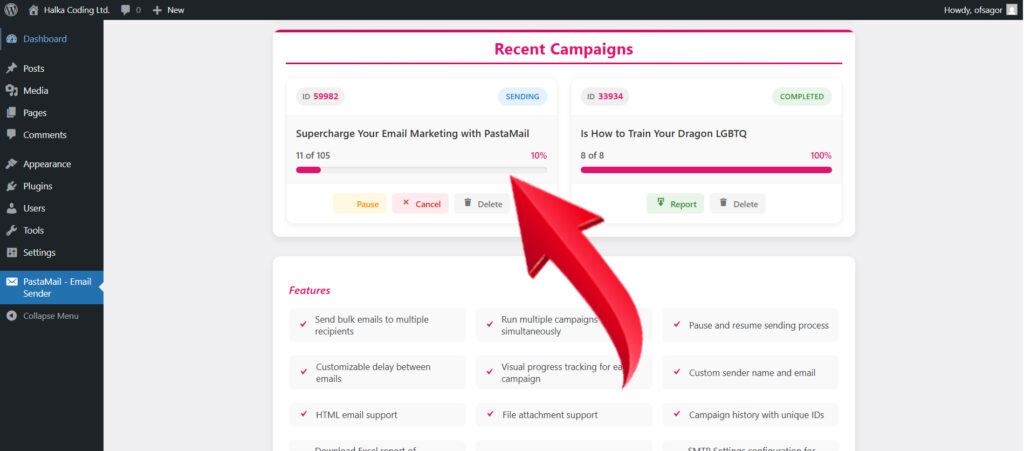
- A unique 5-digit Campaign ID will be generated
- The campaign will appear in the Recent Campaigns section
Managing Campaigns
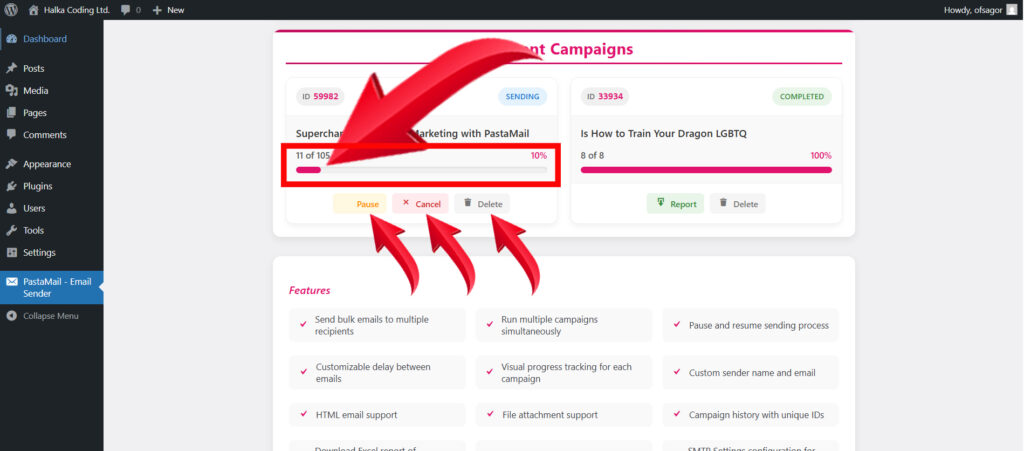
- Monitor Progress
- View all campaigns in the Recent Campaigns section
- See real-time progress with visual progress bars
- Check status: Sending, Paused, Completed, or Cancelled
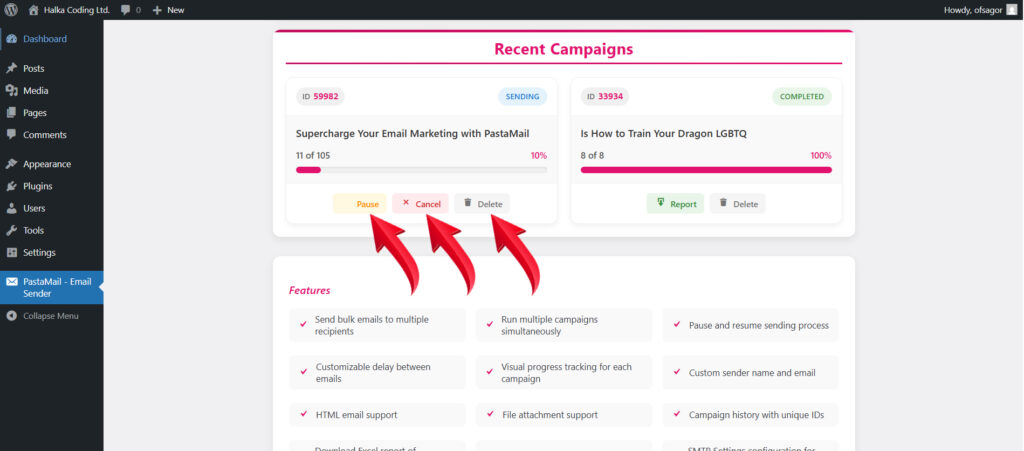
- Control Campaigns
- Pause: Temporarily stop a running campaign
- Resume: Continue a paused campaign
- Cancel: Stop a campaign permanently
- Delete: Remove a campaign from the list
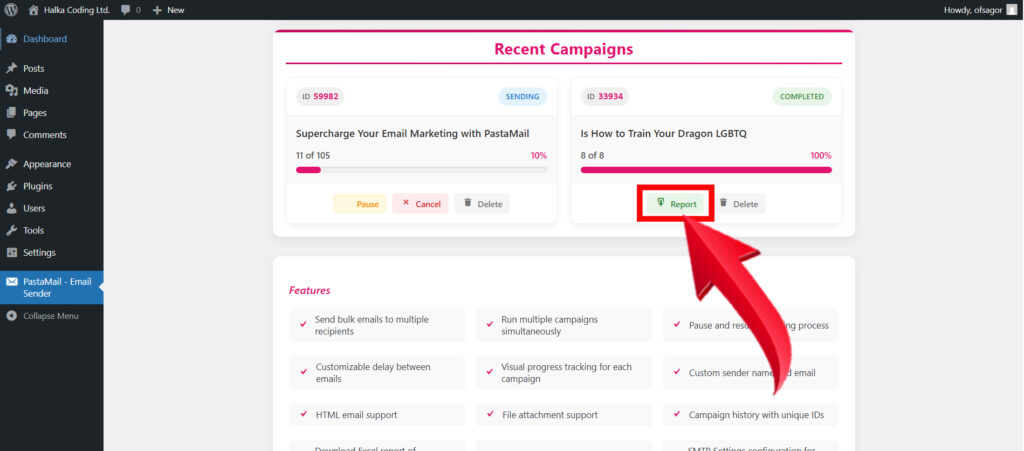
- Download Reports
- For completed campaigns, download a CSV report
- The report shows which emails were sent successfully and which failed
Features
1. Bulk Email Sending
- Send unlimited emails to multiple recipients
- No restrictions on the number of emails or campaigns
- Efficient email queue management
2. Campaign Management
- Multi-Campaign Support: Run multiple campaigns simultaneously
- Real-time Tracking: Monitor progress as emails are sent
- Flexible Controls: Pause, resume, or cancel campaigns anytime
- Unique IDs: Each campaign gets a unique 5-digit ID for easy tracking
3. Email Customization
- HTML Support: Create rich, formatted emails
- Media Integration: Add images and other media directly from WordPress
- Attachments: Include files up to 5MB (JPG, PNG, PDF, DOC, DOCX)
- Custom Sender: Set custom sender name and email
4. Deliverability Optimization
- SMTP Integration: Built-in SMTP auto configuration
- Delay Control: Set delays between emails to avoid server overload
- Auto-generated Settings: SMTP settings automatically configured for your domain
5. Reporting and Analytics
- Progress Tracking: Visual progress bars for each campaign
- Detailed Reports: Download CSV reports of sent/failed emails
- Dashboard Widget: Quick overview of campaign status from WordPress dashboard
- Status Indicators: Clear status badges for each campaign
6. User Experience
- Intuitive Interface: Clean, modern admin interface
- Mobile Responsive: Works seamlessly on all devices
- Real-time Updates: Live status updates without page refresh
- Helpful Messages: Clear notifications for all actions
7. Security
- Nonce Protection: CSRF protection for all forms
- Input Validation: All user inputs are sanitized and validated
- File Security: Secure file upload handling
- Capability Checks: Admin-only access to email sending
Troubleshooting
Emails Are Not Sending
Possible Causes:
- Server mail function disabled
Solutions:
- Contact your hosting provider to ensure mail function is enabled
Campaign Is Stuck
Possible Causes:
- Server timeout
- Too many emails in queue
- Server resource limits
Solutions:
- Increase the delay between emails (try 30 seconds)
- Pause and resume the campaign
- Break large lists into smaller campaigns
- Contact your hosting provider about resource limits
Attachment Issues
Possible Causes:
- File too large (>5MB)
- Unsupported file type
- Upload permissions
Solutions:
- Ensure file is under 5MB
- Use supported file types (JPG, PNG, GIF, PDF, DOC, DOCX)
- Check folder permissions on your server
FAQ
Q: How many emails can I send at once?
A: There’s no built-in limit to the number of emails you can send. However, we recommend sending in batches with delays to avoid server overload.
Q: Can I schedule emails to send later?
A: Currently, PastaMail sends emails immediately when you start a campaign. Scheduled sending may be added in future versions.
Q: What file types can I attach?
A: You can attach JPG, JPEG, PNG, GIF, PDF, DOC, and DOCX files up to 5MB in size.
Q: Will my emails go to spam?
A: Deliverability also depends on your content, domain reputation, and recipient settings.
Q: How do I know if my emails were delivered?
A: You can download a detailed report for each completed campaign showing which emails were sent successfully and which failed.
Q: Can I pause a running campaign?
A: Yes, simply click the Pause button next to the campaign in the Recent Campaigns section.
Q: What happens if I cancel a campaign?
A: Canceling stops the campaign immediately. Any emails already sent will remain sent, but no further emails will be sent.
Q: Is there a limit to the number of campaigns I can run?
A: No, you can run multiple campaigns simultaneously.
Q: Can I export my email lists?
A: Currently, PastaMail doesn’t have built-in list export, but you can copy your email lists from the textarea before sending.
Q: Does PastaMail work with all WordPress themes?
A: Yes, PastaMail is designed to work with any WordPress theme as it operates entirely within the admin area.
Support
If you need additional help with PastaMail, please contact us at support@halkacoding.infosagor.com
We’re committed to providing the best possible experience with PastaMail and welcome your feedback and suggestions for future improvements.